How long does it take you to arrange a drumline chart in Sibelius? Too long, probably.
These 5 hacks will save you time and aggravation, the next time you fire up Sibelius to write for your battery, pit, or whole marching percussion ensemble.
[Bonus: you can also use Sibelius with AirPods or other Bluetooth headphones.]
1) Select multiple items at once
Ever lose time changing noteheads one-by-one? It can take all day, especially if your composition is long or especially dense.
The good news is that Sibelius offers an easy solution:
Multi-select.
Here’s what it looks like:
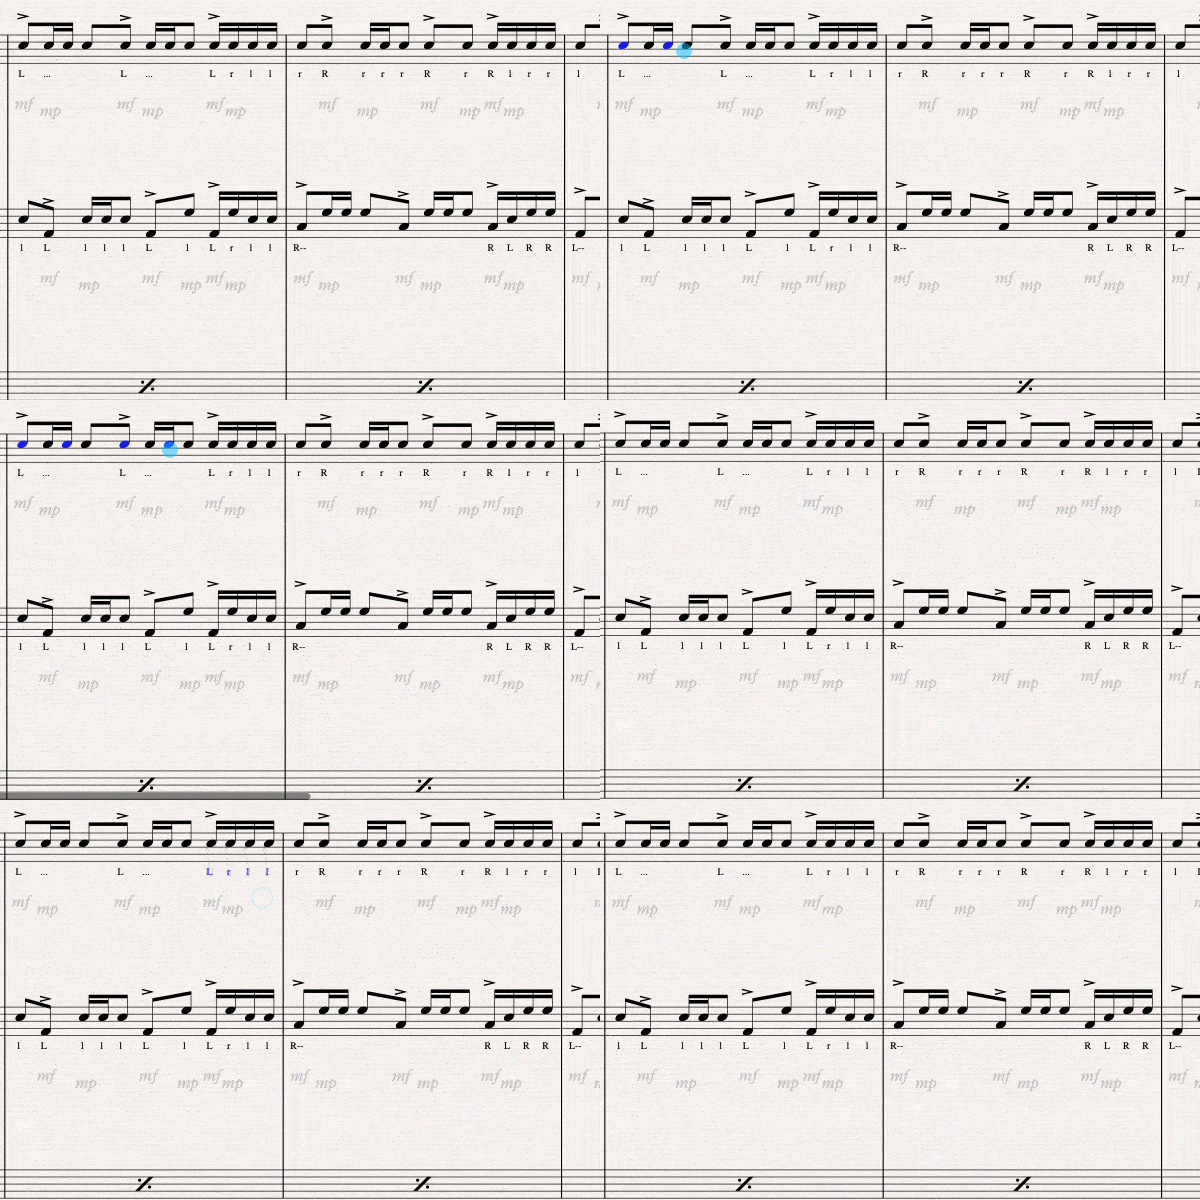
To use multiselect in Sibelius while writing your drumline music, just follow these steps:
While clicking on notes or other items—
- Mac OS: hold down the Command (⌘) key
- Windows: hold down the Control key
This trick is great if you need move or delete a few items all at once.
In my writing, this usually happens if I want to rearrange bass drum notes up or down the line (usually after copy/pasting from elsewhere).
And it goes hand-in-hand with this next one…
2) Edit multiple items at once
Once you’ve figured out how to select multiple items at once (sticking, dynamics, etc), you may need to edit them.
Like the noteheads example above, this one can really take all day.
If you select a few of the same items, you can double-click on one of them, and ALL OF THEM will be edited together.
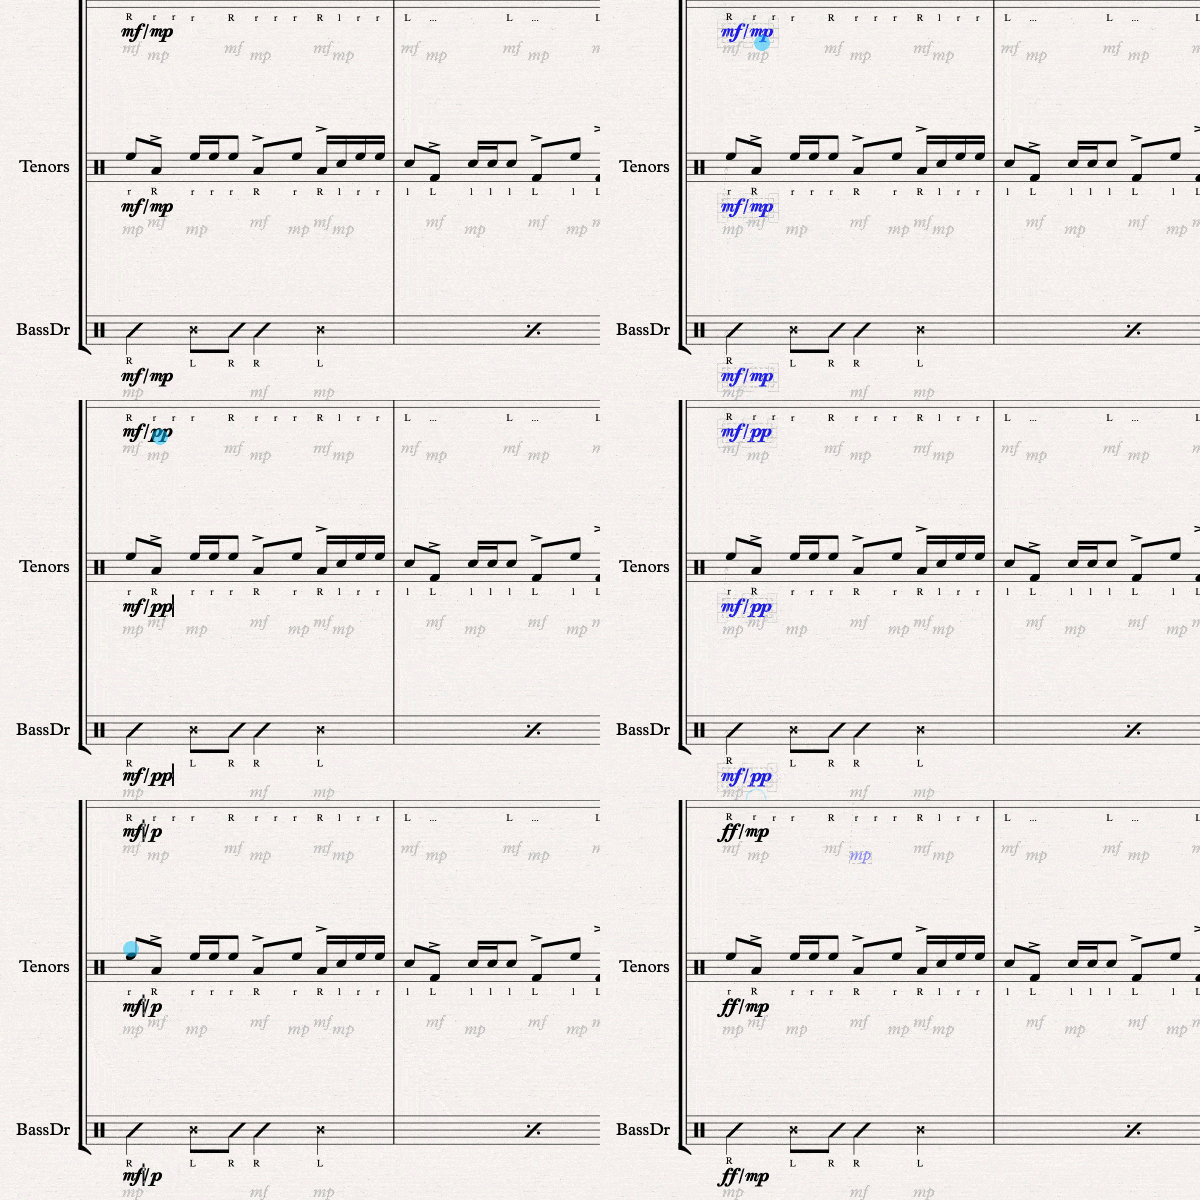
This one is an absolute game-changer. Now you can quickly edit you entire drumline’s dynamics, sticking, articulation, playing zone, system text, or almost anything else.
Editing them en masse is MUCH faster than doing them all individually!
3) De-select or Re-select without starting over
This one was another game changer for me when I first learned about it.
Essentially, the scene would look like this…
- Copy an excerpt
- Paste it somewhere else
- Decide to change the sticking
- Use multi-select to highlight all the sticking R’s and L’s
- Miss! Because they’re small and hard to click on
- Get SO MAD because now I have to start selecting all over again
- Rage quit
- Repeat.
But now I don’t have to rage quit anymore.
What changed?
I learned that selecting (and de-selecting) elements is undo-able.
That means that when you select a notehead or other item, you can hit Ctrl+Z (or Cmd+Z on Mac) to UNDO that step.
And POOF your selected item is no longer selected.
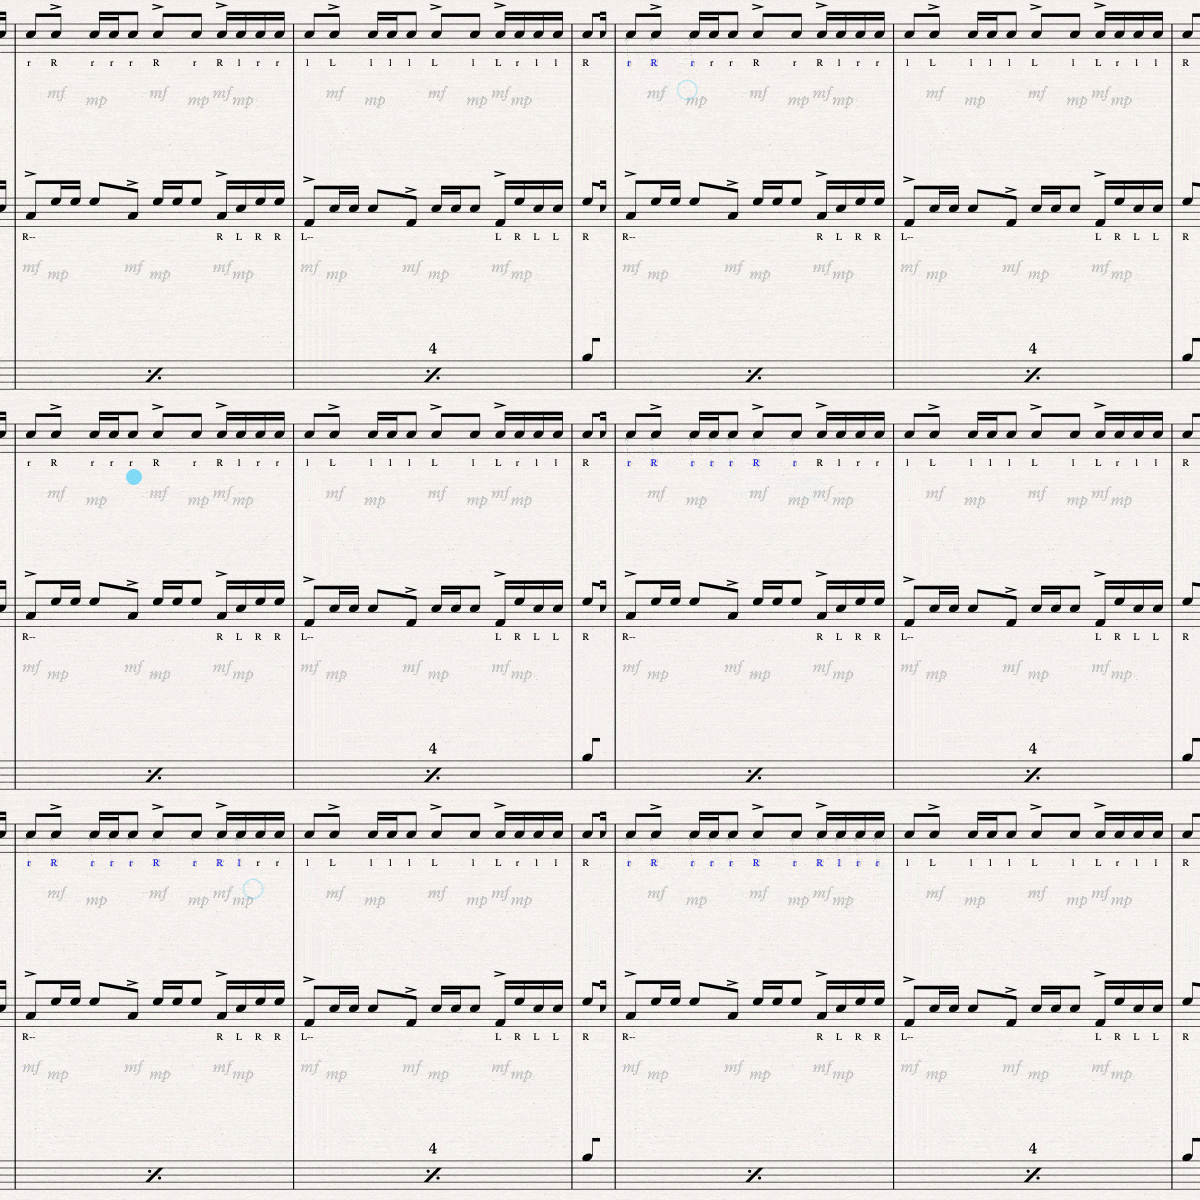
And it works both ways.
Accidentally UN-selected something? Hit undo and BOOM—it’s selected again.
So now my process usually looks something like this:
- Copy an excerpt
- Paste it somewhere else
- Decide to change the sticking
- Use multi-select to highlight all the sticking R’s and L’s
- Miss! Because they’re small and hard to click on
- Hit undo, and get my selection back again
- Move on!
Ahhh, much better.
4. Easy 2-height playing that sounds great & still looks good
I’m kind of embarrassed to admit that this one took me way too long to figure out.
Like, 10+ years.
It’s a fairly common problem, too. Tapspace’s support forum has this question posted going back to 2006.
My solution is a little clumsier than their recommended fix, but I like it better—basically because it’s faster and easier to write or copy/paste.
All I do is write in extra Expressions (dynamic markings), and then hide them.
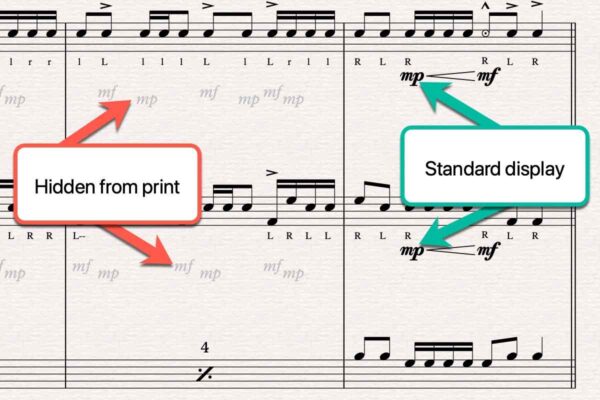
See? Clumsy.
And I admit—it doesn’t look great while editing. It’s definitely crowded.
But when you export your battery score as a PDF and print it for your drumline, the hidden dynamics are… hidden.
So the finished product looks much cleaner than the clumsy Sibelius file.
“Ew, that’s ugly!” I can hear you saying
Yea, I know. And it’s not the “right” way to accomplish 2-height playing in Sibelius.
Tapspace actually posted a screencast video of the “right” way, in 2018 (yet still somehow on Sibelius 6?)
But I like my method better because it’s fast.
I don’t have to select individual notes, open up the Inspector, and manually adjust the Live Velocity settings.
I don’t have to remember if the notes I just copied/pasted from one bar to another have a custom Live Velocity applied.
I just have to copy some hidden Expression markings and paste them in. (Or hit ⌘+E to type in a new Expression, and the ⌘+H to hide them.)
Voilà.
Quick, easy 2-height playing for your marching percussion arrangements in Sibelius.
5. Set easy-to-read note beams & stems
I guess I’m a perfectionist. I don’t mean to be, but here we are.
When I write drumline parts in Sibelius (or anywhere for that matter—even by hand), I always group my notes into 1-beat stem groupings.
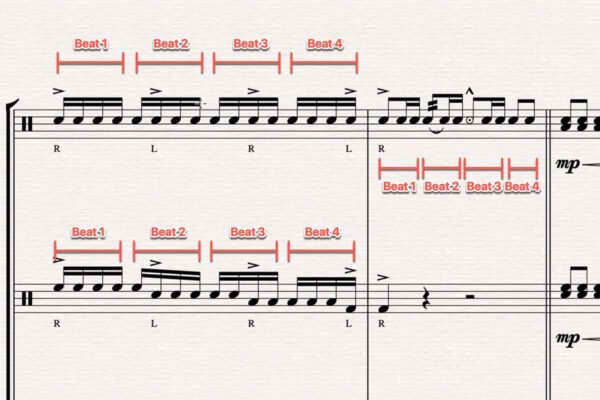
I do it so my students know exactly how their part lines up with the beat.
But, by default, Sibelius tries to hit me with this nonsense:
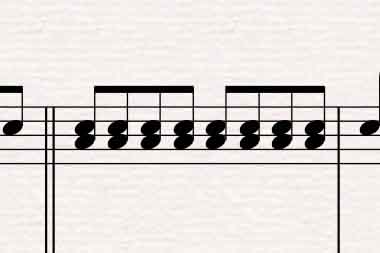
(I know lots of people prefer this. Too bad. Don’t @ me.)
To avoid having to manually re-stem my notes every bar, I reset the beam groups.
Like this—
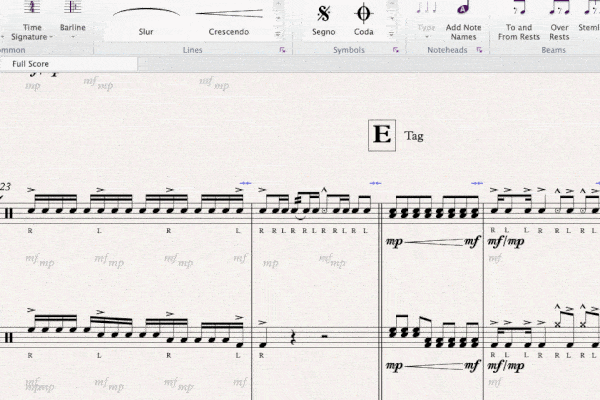
Just a few steps:
- Navigate to the Notations tab
- Click on Time Signature
- Click on More Options, which is at the bottom of the drop-down Time Signature menu
- Click on the Beam and Rest Groups button in the Time Signature popup
- In the field labeled “Group 8th (quavers) as:” type in 2,2,2,2
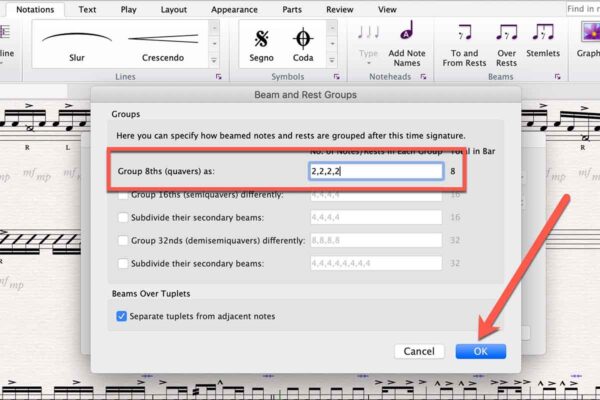
If you haven’t already told Sibelius where to insert this fancy new Time Signature of yours, you’ll have to do that once you hit the Ok button.
That’s it!
Now all your marching percussionists’ music will be grouped into easily-readable one-beat groups.
What did we miss?
What are your favorite Sibelius drumline music hacks and tricks? Let us know in the comments below 👇👇

